Condo Renovation

Sunday, January 27, 2013

Living Room Mirror update

Our living room comes with a life size mirror but it looks incomplete and quite frankly, cheap.  We used leftover baseboards from a previous project to complete the desired look. We did the same way with our Guest bathroom mirror. You can see the tutorial there.http://timnemy.blogspot.com/2011/12/guest-bathroom-updates.html
BEFORE

AFTER

Sunday, April 22, 2012

Painted Jute rug

We bought a nice 10x8 Jute rug a couple of months ago. Two small dogs and a couple of clumsy wine drinkers, the rug went down south pretty fast.  So we had to come up with a solution on how to revive and restore this once beautiful rug.  Here's our version:

Materials:

1. Painters tape/Frog tape
2. Latex paint with your choice of color -- any finish  (We used interior paint in eggshell base)
3. Xacto Knife
4. Yard Stick
5. Spouncer/Stencil sponge
6. Measuring tape
7. Scissors
8. Fabric Medium - Martha Stewart brand (this is the only brand they have at Michael's)
NOTE:  Fabric Medium calls for a 1:2 ratio (medium:paint) mixture.

Take your time finding the right design.  Once you figure that out . . . use a carpenter's pencil to draw it out.


Before:Pretty Nasty


                                                                   Keep on taping

                                                                      Still taping

                                                  Yay! Taping's finally done phew!!


Score lightly with the Xacto knife to cut off excess tape


Taping Complete!!!

Now start pouncing your paint and once the paint is dry peel off your tape.


Walah!!! here is the finish product

Couldn't be more proud of the out come. 


Monday, April 16, 2012

Tutorial: Coffee table to Ottoman transformation

For this project you will need the items listed below:

1. Old coffee table or side table or you can build your own.  We got ours from thrift store for $6.25
2. Foam sheet (They can be quite expensive so if you want you can buy memory foam mattress top to save some money)
3. Batting sheet
4. Glue
5. Fabric
6. Paint or stain for the legs.
7. Drill and drill bit
8. Cover button kits - Michaels, JoAnn's, Hancock Fabric or any other craftstore
9. Needle and thread
10. Heavy duty stapler/glue gun ( We prefer the stapler )


Step I:     Drill holes on top of the coffee table; a for the button patterns. At least half the size of your buttons.

Step II:    Stain or paint the legs. You can skip this step if you like

Step III:  Cut the foam sheet to the same size of  the top and sides of the table.  Secure with glue.

Step IV:  Once the foam is in place cover them with batting sheet.


Step V:  Cover with your choice of fabric and staple it with your stapler at the bottom of the table


Once covered, you can start making you button using cover the fabric button kits. Instruction should be included with the kit.

Use the strongest thread  you can find, it also helps if you have extra long (6"+) needles.


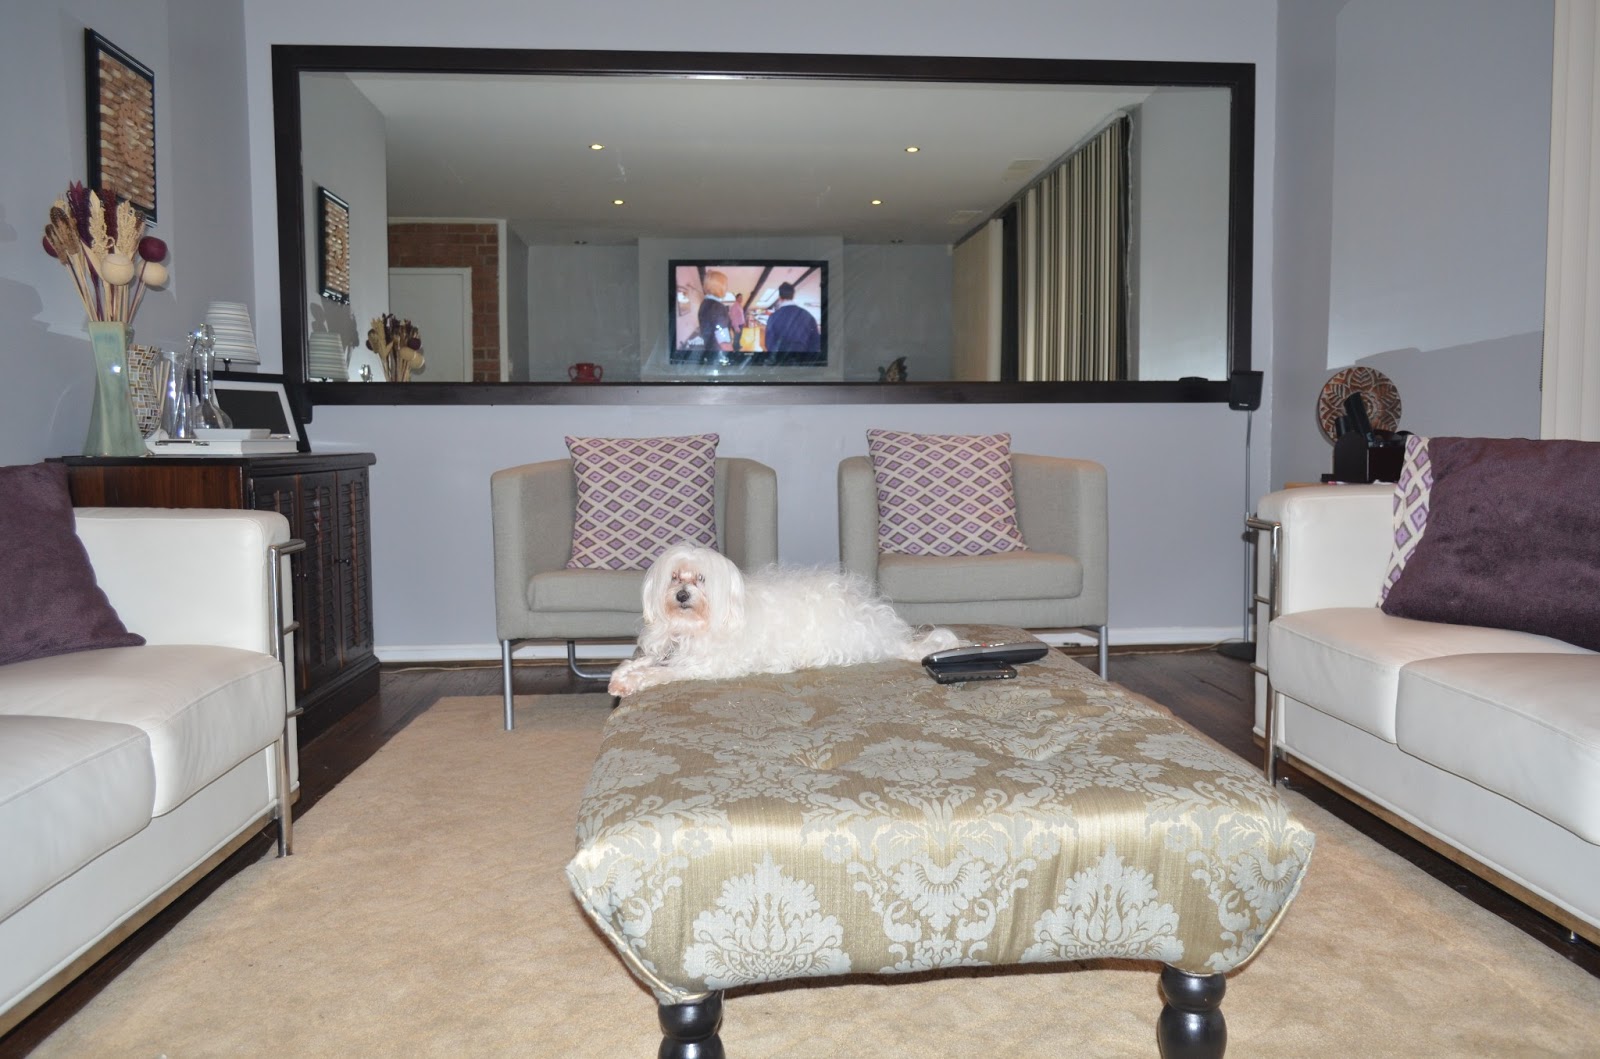
Final step:  Doggy test your new Ottoman!


Tuesday, February 28, 2012

Hallway closet transformation

We have this long and narrow hallway closet. Yes! of course we love the space for coats and other things . . .  but we also need a dedicated space for our everyday clutter:  bills/mail, wrapping paper, books, and other miscellaneous 'clutter'. So we decided to split the hallway closet in two.  One third of the closet continues to hang on to being a coat closet (get it, 'hang on') and the rest becomes our clutter destination.  Did we mention that we don't have an office or den in our condo?

In this project we bought three new bi-fold doors and some pinewood for the shelves (painted in beautiful semi-gloss white)  As for the table/desk we were lucky enough to reuse a solid oak table-top that someone threw out a while back!  Nice, strong and sturdy.  We will most likely end up using the other half for our dining bench. 

We also added a $7.00 porch light (not seen in any of these posted pictures), but we put the light switch on the outside of the closet.  We also ran some cable lines for internet and of course a new electrical outlet to supply power to:  Modem, Router, Printer(s) and a small shaded table lamp.

Before  you put on the top shelf, please take a moment to measure the height so you don't end up with useless space!!


Wednesday, February 22, 2012

Spice Rack

We admit! we have  a little   a huge???? more like a hardcore obsession with spices and hot sauce. How often do you encounter people who would travel miles and miles just to get a bottle or two of hot sauce? Well that's us, unfortunately.  We would travel to Peppers in Rehoboth Beach, Delaware every now and then to restock and of course -- to please our taste buds. Having said that, we need a place to store and/or display our over flowing hot sauce and spices that we use daily. We need something that is easily accessible while cooking.Yes! we do have those pre-manufactured spice racks but in a small kitchen where space is at a premium, they tend to take up a lot of the space which we need desperately!

We finally came up with an idea to make use of the wall between our counter top and wall cabinets. Most people will put back splashes to make the kitchen look beautiful . . . but we figured, why not convert this 'empty' space for storage. We did splurge quite a bit in this project but we think it is all worth it.  

How do you store your spices? Does it make your cooking world easier? Well ours does, and we couldn't be more happier :-D

Materials:
Spice rack:  Ikea Ribba Picture ledge @ $9.99 (22") or $14.99 (45")
Spice jar:  Ikea  Rajtan spice jar 5 oz. @ $3.99/4pack
Paint: Rust-o-Leum chalk paint @ $9.99/can


                                                                     Before


After


Living room entertainment area

Ok, so...we have somewhat of a big living room, it is rectangular in shape and quite long. After moving our furnitures and TV (entertainment center) around quite a few times, we just could not find the right placements for anything that made watching TV comfortable... it always seems like our TV is miles away, so we came up with a solution.....

We decided to build out the wall and put a mantel across the whole wall then mount the TV. Its has been quite a journey since the His vs Her styles are quite different. After browsing around the internet trying to get some ideas, finally we found one that the both of us like.

Inspiration


We made some modifications from the inspiration and tweaked it to meet out needs. Example: we desperately need a place to store our Yamaha Keyboard etc etc...
We are planing on putting a electric fireplace on top of the bottom drawer (keyboard drawer). Hopefully before next winter.


The TV is mounted on a articulating mount . . . so we can watch TV while eating dinner (if we so desire).

Material:  Pinewood and Pine boards
Color:  Minwax Ebony Woodstain (black semi-gloss paint would have done the trick too)
Protective coat:  Beeswax for a good shine.
Drawer Handles:  Ikea LANSA

Our product!

Next up:  Re-arranging the living room furnitures to fit more people!

Tuesday, February 14, 2012

Happy Valentine's Day

Happy Valentine's Day everyone!!!! We wish you love and happiness and much more for years to come.
We have done a lot of reno and updates over the past couple of weeks but nothing to show for yet. So hang tight and we will  post more exciting updates and renovation and hopefully some tutorial too :-D. In between our crazy renovations we managed to find time to do some baking so here is to celebrate Valentine's day...... Cup cakes for every one. :-D